 I’m not crazy about much of anything we can buy in today’s furniture market, at least in my price range. It’s all badly designed and sloppily made using cheap materials, including a lot of plastic. I feel that even a practical piece of furniture such as a computer desk can be well designed and interesting to look at. And it’s not all that difficult or expensive to make it yourself.
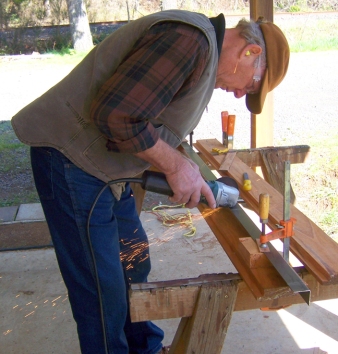
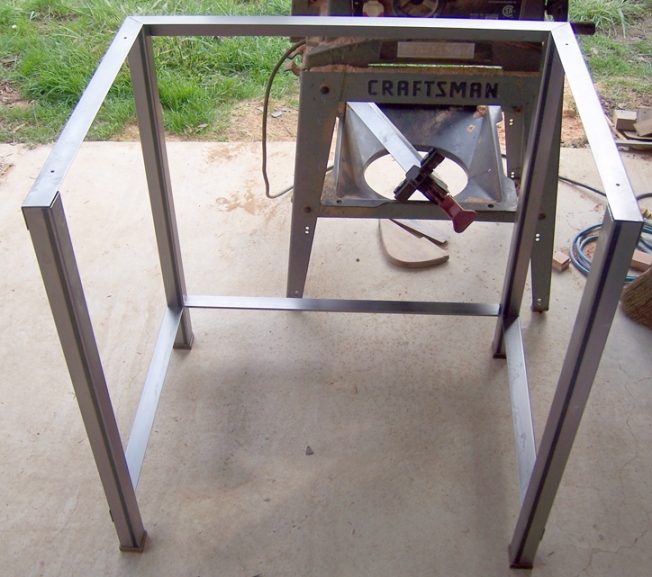
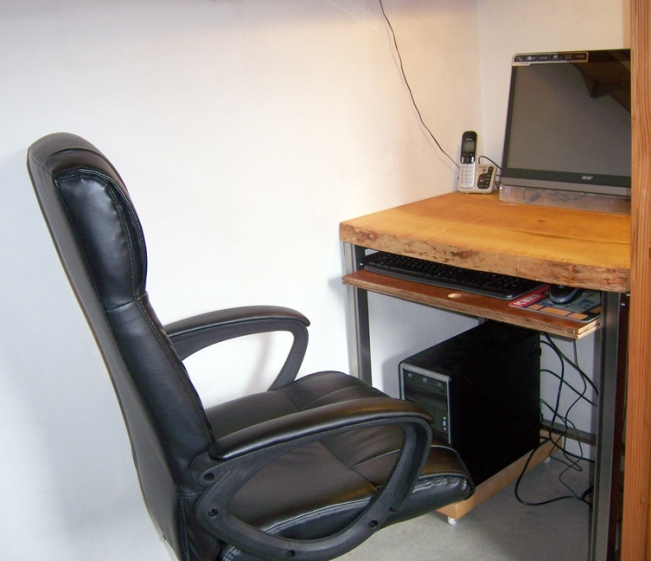
I bought a length of 1-1/2″ square metal tubing (wall thickness roughly 1/16″) and enough steel angle to build a nice, sturdy structure that could hold up a heavy wooden top. I cut and bent the angle steel so that it formed a three-sided structure, allowing for a chair to fit underneath.
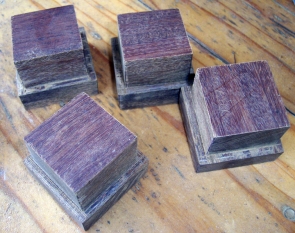
I made wooden feet from some ipe (that’s a hardwood) that I had. I cut out blocks, then cut a little off each of the four sides of each block so that they fit snugly inside the metal tubing, leaving about 1/2″ for a foot. A nice look and a way to protect the floor.
For the top, I had several 2″ thick slabs of rough-sawn wood that I got from a local sawmill last summer. I knew the seller well and got a great price on some beautiful big leaf maple as well as Lebanon cedar he’d cut down in someone’s yard. The slabs had been drying for about ten months and looked good. I decided to use the cedar for this project.
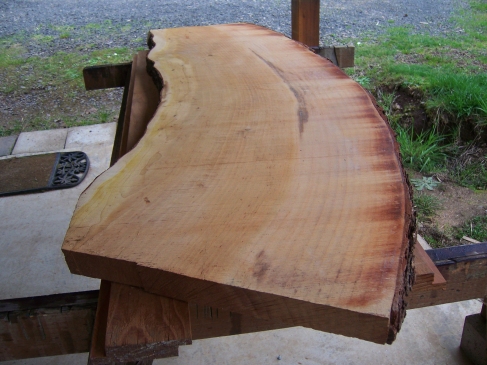
The tricky part was picking out the part of the cedar I wanted to use for the table. It wouldn’t be deep enough so a second piece would have to be glued to the first and they’d want to match or at least, go well together.
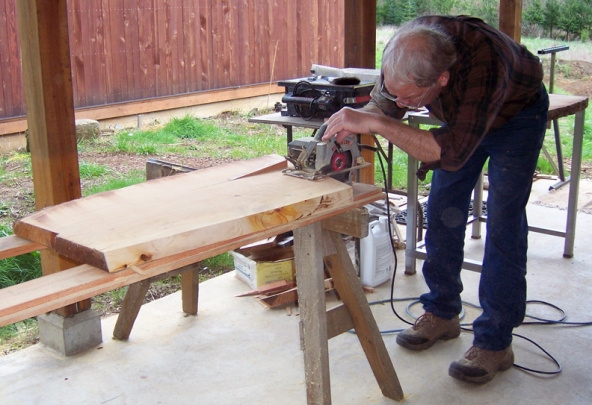
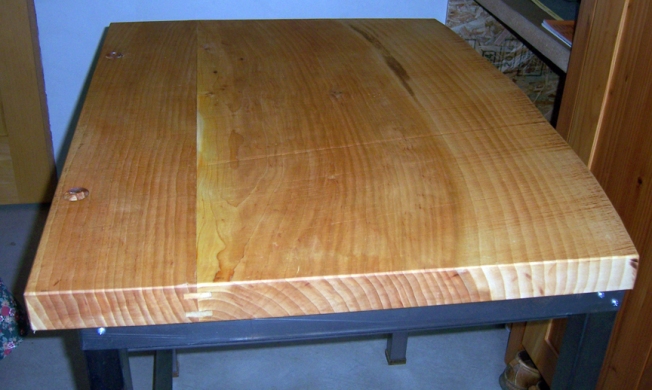 A lot of cutting and sanding later, I had pieces that worked. I splined and glued the pieces, removed the bark, then finished with clear Sitkens stain, one of my favorite finish products. I also added holes for the computer cords, etc.
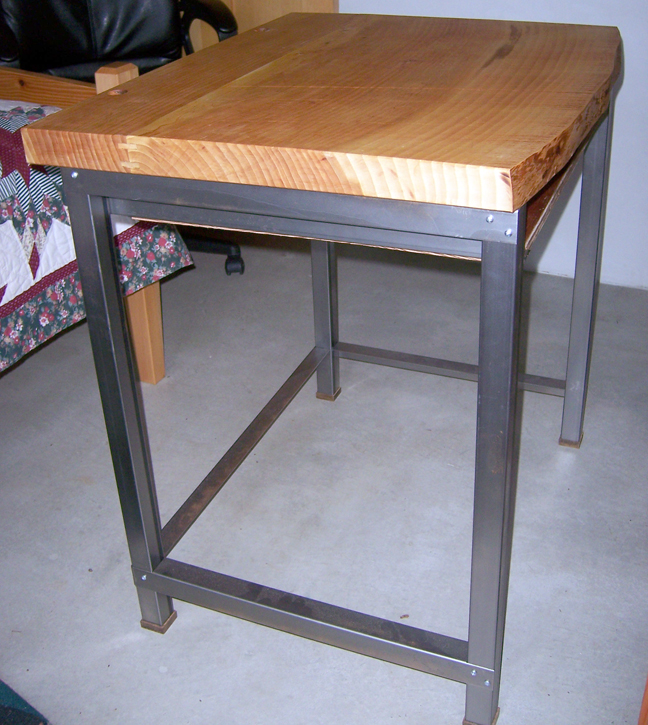
I added more angle steel to hold a shelf for the keyboard, and my new computer desk was ready to use.
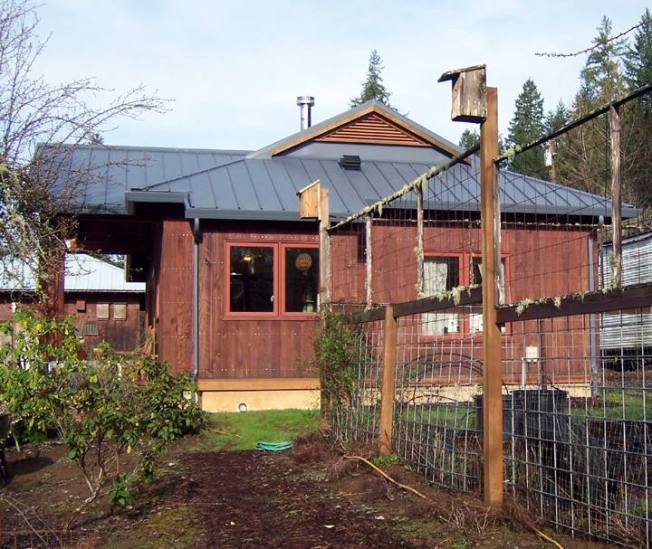
 You won’t find this at Ikea, or anywhere else for that matter. It’s not a design everyone will love, but suits me. That’s the beauty of building your own stuff.
I didn’t include a lot of detailed instructions here, as most of it is self-explanatory. Please ask questions if you have any about this project or any others included on this blog.
And thanks for stopping by! Be sure to check out our bridge book if you’re thinking about a DIY suspension bridge. Here is the link: Building a Small Cable Suspension Bridge with the Cable Locking System
Images, diagrams, and text copyright 2016 by Marvin Denmark unless otherwise noted. Please do not copy and post my content anywhere without my permission. Thank you.