I am still plugging along on my DIY house construction project in western Oregon. I’m just about ready for drywall at last. Meanwhile, Oregon code requires that there be a vapor barrier. This requirement could be accomplished also with a paint barrier applied later in the construction process. But since I have always used visqueen as the vapor barrier, I was going to continue with what I knew. By the way, this is how you spell visqueen – it’s not visquine.
Visqueen presents some real problems in installation. It doesn’t always lay flat, it tends to “squirm” about when trying to attach it, and it doesn’t cut easily (in the 6 mil). Cutting for openings usually results in a much larger opening than is necessary and too large to seal successfully.
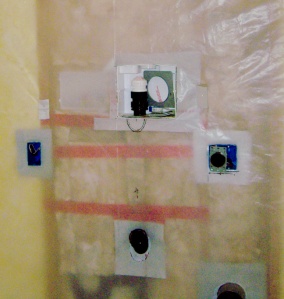
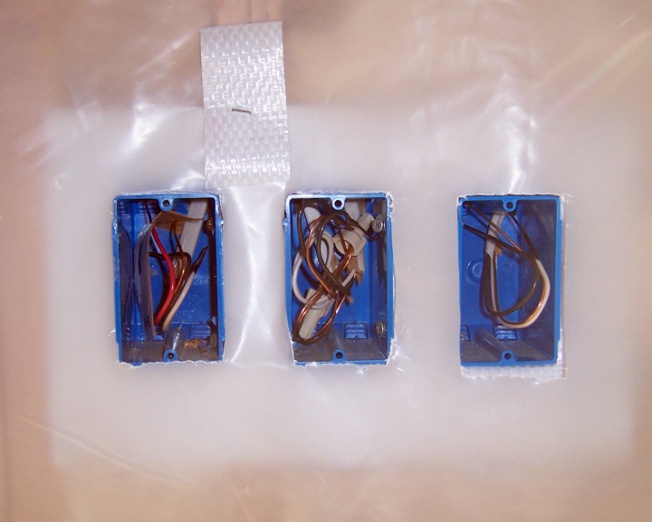
This prompted me to come up with a simple gasket that could be cut tightly around a light or receptacle box or ceiling fan housing. I cut the gaskets from roof covering material originally meant for my carport – glad that I found a use for that stuff, as it was an epic fail as a roof covering material. The gaskets could be rapidly cut out using standard size sheets and an electric receptacle box sized piece of wood to cut out the “opening.” This gasket could be quickly placed over each box. After the visqueen had been placed on the walls and stapled adequately (not excessively), the openings could be cut out with a little less care. The gasket and visqueen were then bonded together with Flex-Seal into a well sealed opening in the vapor barrier.

You can see the roofing material behind the boxes in this photo.

My cut out for the receptacle box on the right was a little off, but saved by the background layer of roofing material which was easily cut tight to the box.
What it’s all about
Vapor diffusion is the movement of moisture in the vapor state through a material. It is a result of a vapor pressure difference (concentration gradient) or a temperature difference (thermal gradient). Vapor barriers, these days more accurately referred to as vapor diffusion retarders, are installed to reduce how much water vapor can get inside a building. Vapor diffusion retarders are installed throughout the structure and sealed up.
Vapor retarders are measured in “perms” for permeability. Class I vapor retarders, with 0.1 perms or less, are glass, sheet metal, rubber membrane, and polyethylene sheeting. Class II vapor retarders have between 0.1 and 1.0 perms. They are unfaced expanded or extruded polystyrene, 30 pound asphalt coated paper, plywood, and bitumen coated craft paper. Finally Class III vapor retarders, with greater than 1.0 and less than or equal to 10 perms: gypsum board, unfaced fiberglass or cellulose insulation, board lumber, concrete block, brick, 15-pound asphalt coasted paper, and house wrap.
The type of construction and location of the building factor into if vapor diffusion retarders are needed and if so, how much. In milder climates, painted gypsum wallboard with a plaster coating may be all that is needed to prevent moisture from diffusing the building. Higher-per vapor diffusion retarders are needed in more extreme climates. They also do the best job if installed on the warm side of the structural assembly – which means close to the interior in cold climates and close to the exterior in hot/wet climates.
In southern climates a combination of an air barrier and vapor diffusion retarder can help keep the humid outdoor air from entering the building cavities. The material is usually installed around the perimeter of the building just under the exterior finish material. Sometimes the air barrier/vapor diffusion retarder IS the exterior finish.
If an existing building has moisture issues because of a lack of proper vapor diffusion retarders, numerous layers of “vapor barrier” paint can be a way to improve the situation.
In any case, vapor diffusion retarders or air barrier/ vapor diffusion retarders won’t do a good job unless they are installed and inspected carefully and all leaks are sealed. The more extreme the climate, the more crucial it is to provide a perfect installation job.
If you want to read more about all of this, check out this article from the Building Science Corporation by Joseph Lstiburek, Ph.D., P.Eng.
Be sure to check out my book about building a bridge. It includes some cool ideas that apply to other projects, like how to put a really tall post into a deep hole when you aren’t that tall. Here is the link:
Building a Small Cable Suspension Bridge with the Cable Locking System
Images, diagrams, and text copyright 2014 by Marvin Denmark unless otherwise noted. Please do not copy and post my content anywhere without my permission. Thank you.
