Aquaculture Greenhouse Project 2021

Our greenhouse in winter of 2014

We purchased most of the parts for another 24′ greenhouse from a yard sale and installed it in 2009 or thereabouts. We never really put it to use, then a heavy snow and ice storm came along and that was the end of it. We were still building our house in 2014 and so put off rebuilding. Meanwhile, I decided on a purpose for the next one: aquaculture. I’ll mix growing fish with growing plants, along with chickens and a small worm farm.

So, armed with a goal, I sorted through the usable parts from the wrecked greenhouse, acquired a few more, and got to work. I’m at the point where we’re about ready for the plastic covering, once I install the tracking system for the squiggle wire that holds the plastic in place. Here are photos of the progress from beginning to where I am with it today:

As you can see, I built sliding barn doors for the north and south ends – double doors on the north and a single slider on the south. Once it’s covered, we’ll see about installing the fish tanks and getting all that set up using the farm spring water. Stay tuned!

Thanks for stopping by. Be sure to check out our books about building a yurt or a small cable suspension bridge. The links to purchase are on the introductory page:

Introduction to Wildcat Man

Images, diagrams, and text copyright 2013-2021 by Marvin Denmark unless otherwise noted. Please do not copy and post my content anywhere without my permission. Thank you.

Building a Wood-Framed Panelized Yurt: the book

YurtBookCover-w-Template-FINAL-COLOR

We have a book! Actually, we have two books. Links to purchase them are below. Color printing costs were high on a 176 page book, so we also published a black and white version. The price is about 40% less than the color version, and the photos are clear enough to illustrate the task at hand.

B&WBOOK

Here are the links:

Building a Wood-Framed Panelized Yurt, in color

Building a Wood-Framed Panelized Yurt, black & white

yurtbooks

DIY Rustic Barnwood Table

OldBarn-Snow
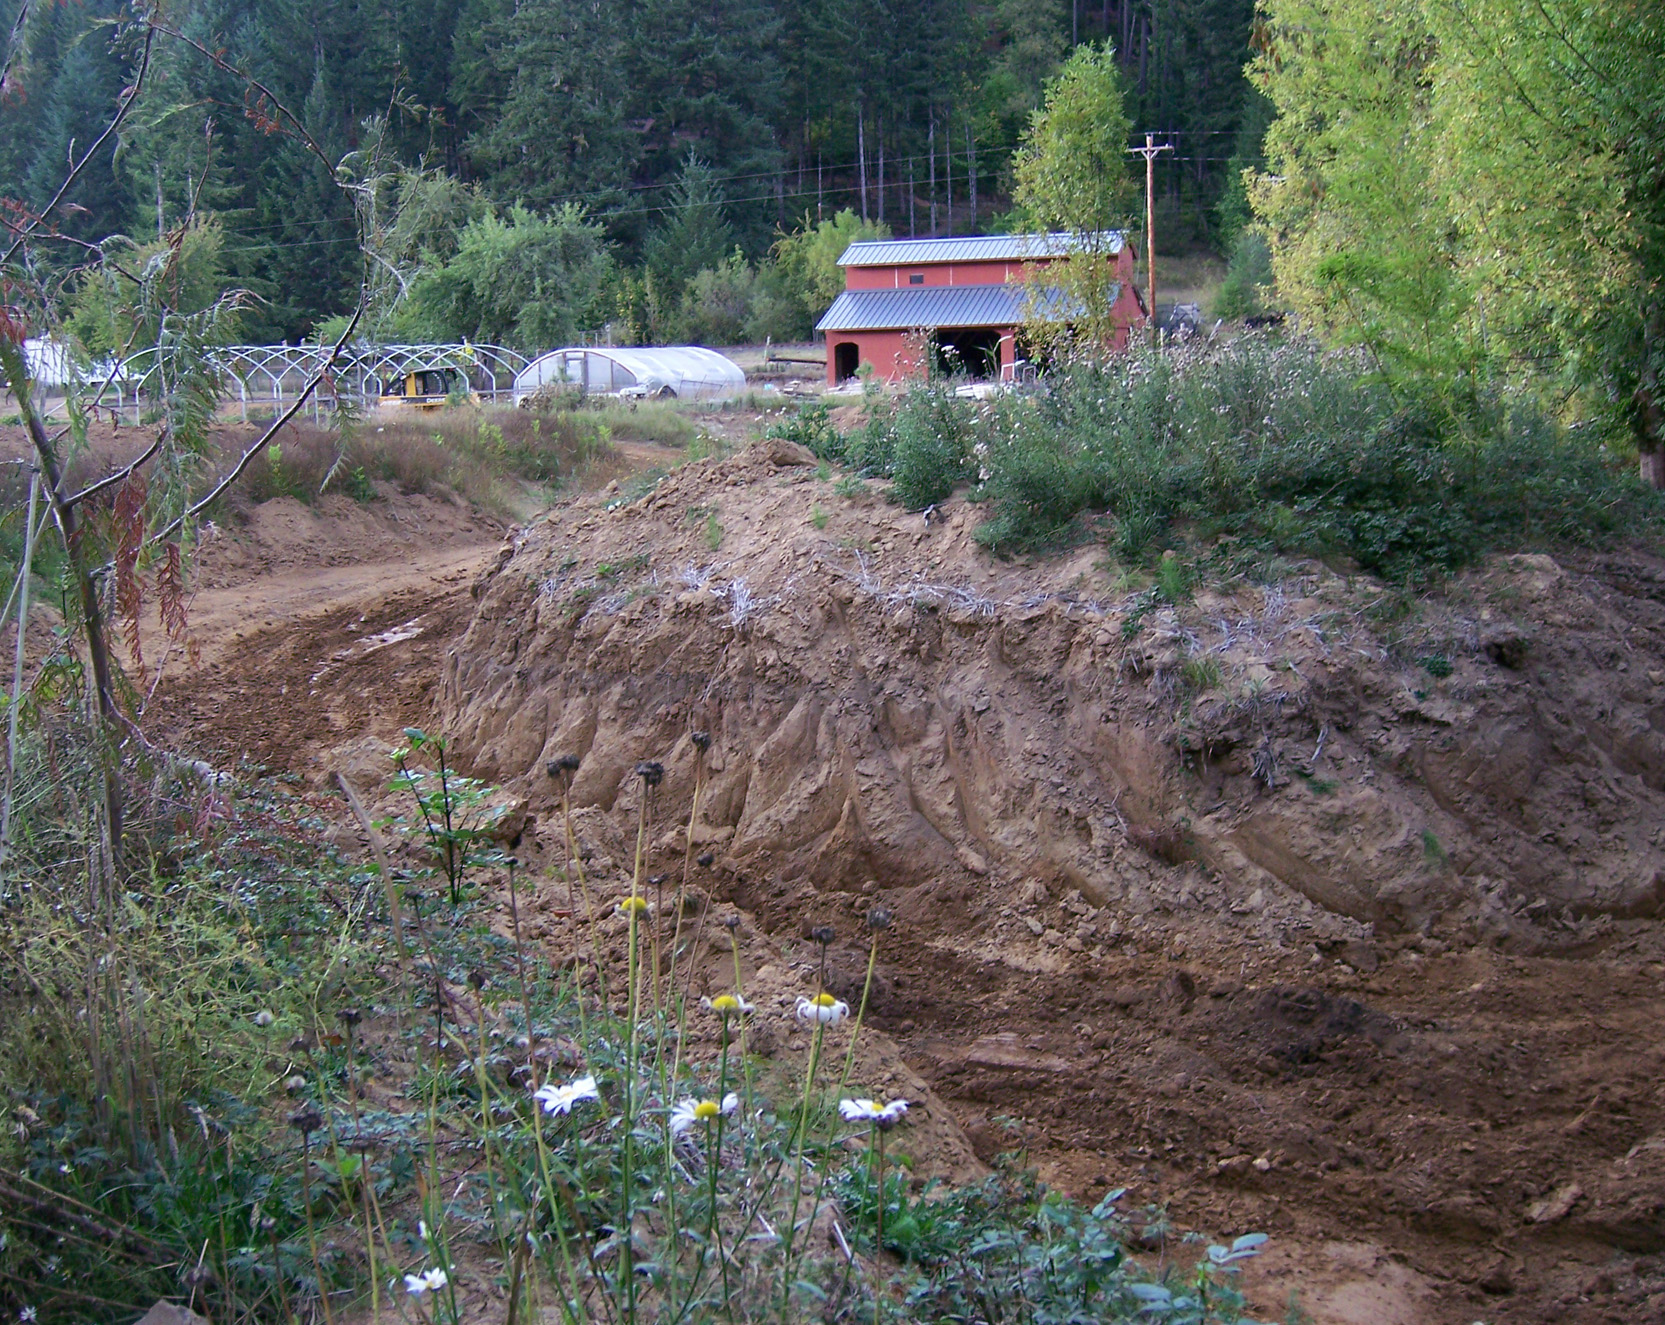
In 1980, an unusually heavy snowfall severely damaged the old wooden barn on our place. We propped the roof up and used the barn for another 10 years or so before taking it down and building a replacement.

My beautiful picture
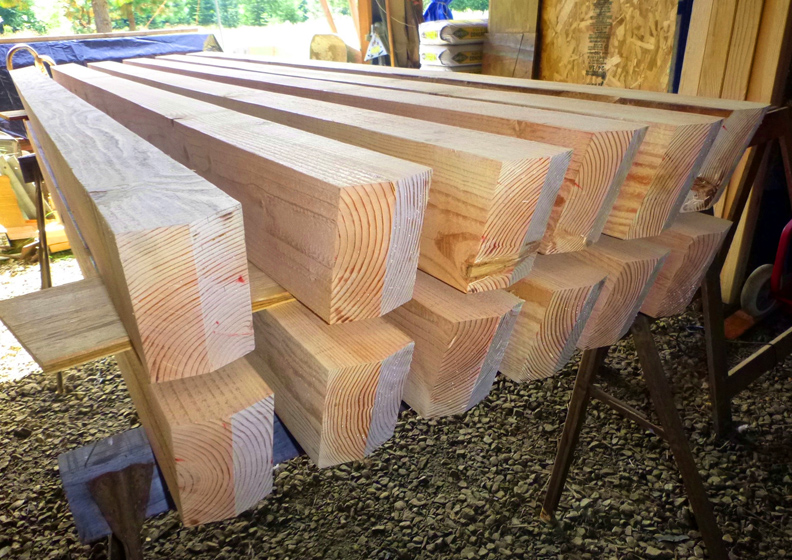
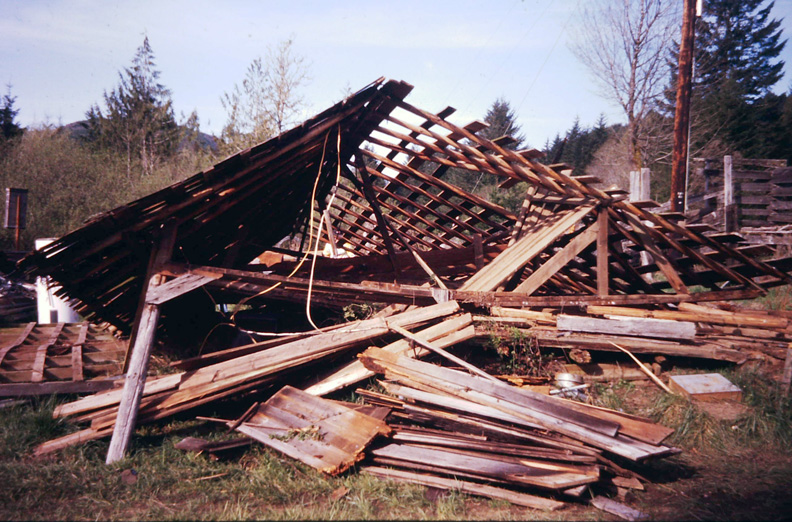
Most of the Douglas fir wood was damaged, but we saved the rest and have used it for various projects, plus have given a lot of it away.

100_5261

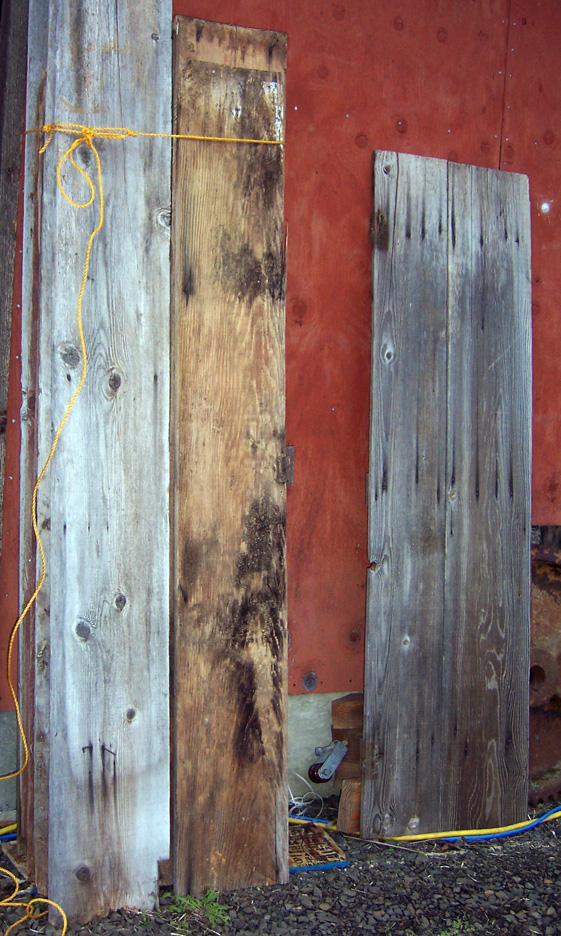
We wanted a small table with a shelf to fit between our two recliners: something more interesting than the usual fare. I decided to create a table that appeared to be rustic old. The old fir barn wood fit the bill! I chose pieces that still had some red tone from the hundred-year-old paint job.

I won’t include measurements here because you can make your table any size you want, just by following these steps.

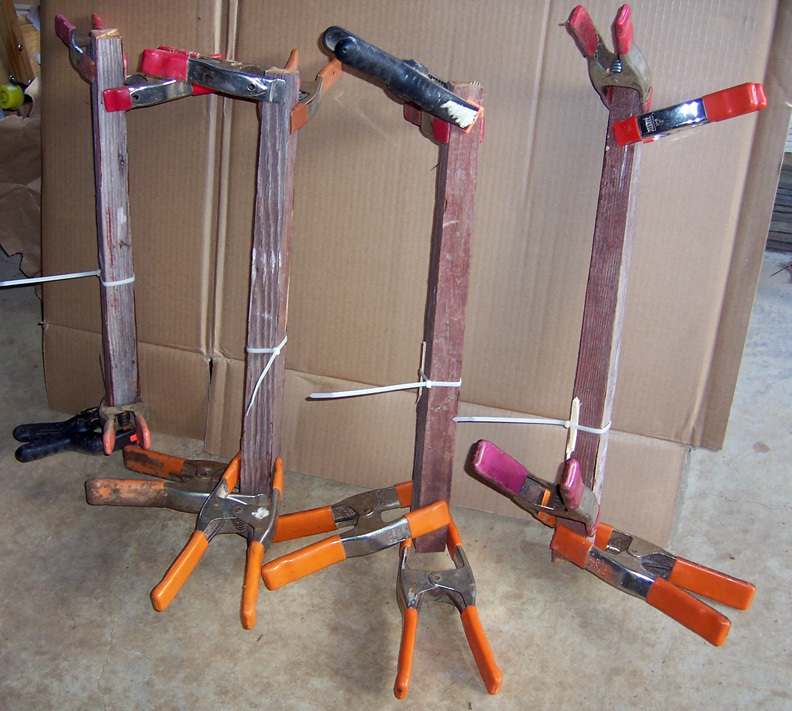
After cutting and sanding all the pieces for the project, I glued the three top pieces together (center plus two sides). I clamped them flat and glued with wood glue.

For the end pieces, I cut a 3/8 inch slot on each end of the table and on each end piece, then splined the top and ends with (3/4 inch blade-kerf width) wood splines and glued. Once dry, I tapered the sides from center to end.

I scorched the exposed edges to continue with the vintage look. Metal pieces clamped in place prevented me from scorching the top or bottom.

I assembled the apron next, then inserted the pre-cut corner blocks. These were cut out for the leg tenons.

The table saw blade is set at 45° so that all the cuts on the legs are 45°. Meanwhile with a tapering jig against the fence, the tapering jig is set so that the leg will taper 1/4″ in its entire length as it is being cut. I screwed in tying blocks and taped them to the leg top surface to keep the leg from sliding as it was being cut. I used a homemade pushing stick to keep my hand away from the blade.

I taped the leg parts together as a test for fit, and once okay, glued and clamped.

BarnTable11

I cut out the leg tenons using multiple passes on a table saw and then cleaned them up using a chisel. It was a tricky business with the old, brittle wood.

I assembled the top to the apron, using tape for correct placement, then screwed the apron to the table top through the pre-drilled holes in the blocks.

I inserted each leg tenon into the blocks and screwed through the pre-drilled hole in the middle.

I custom-made metal tabs that would hold the shelf using some metal scrap I had around.

The tabs were installed at the height of the bottom of the shelf.

FinishedTable

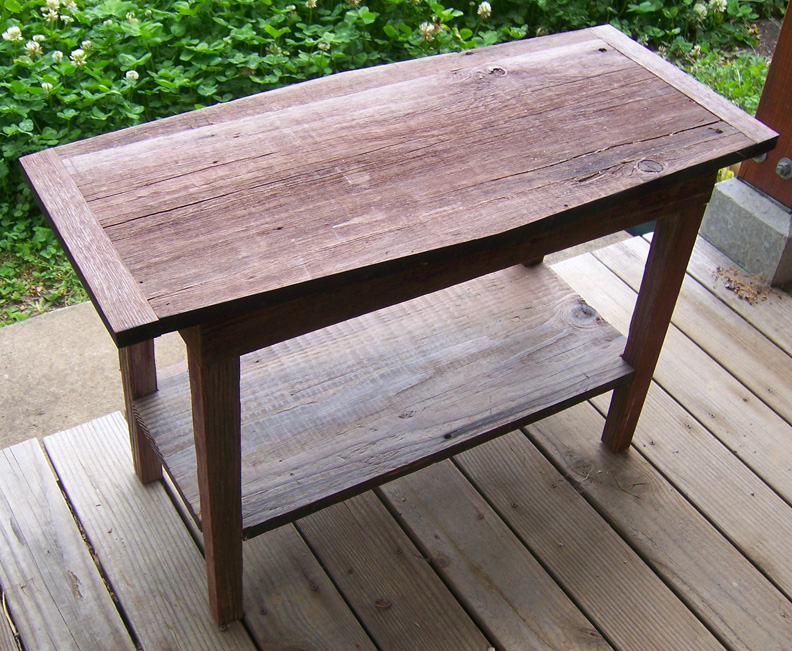
I applied a clear lacquer finish to prevent any modern stains. I like that all the flaws are historic.

Thanks for stopping by! Be sure to check out our suspension bridge book. Here is the link:

Building a Small Cable Suspension Bridge with the Cable Locking System

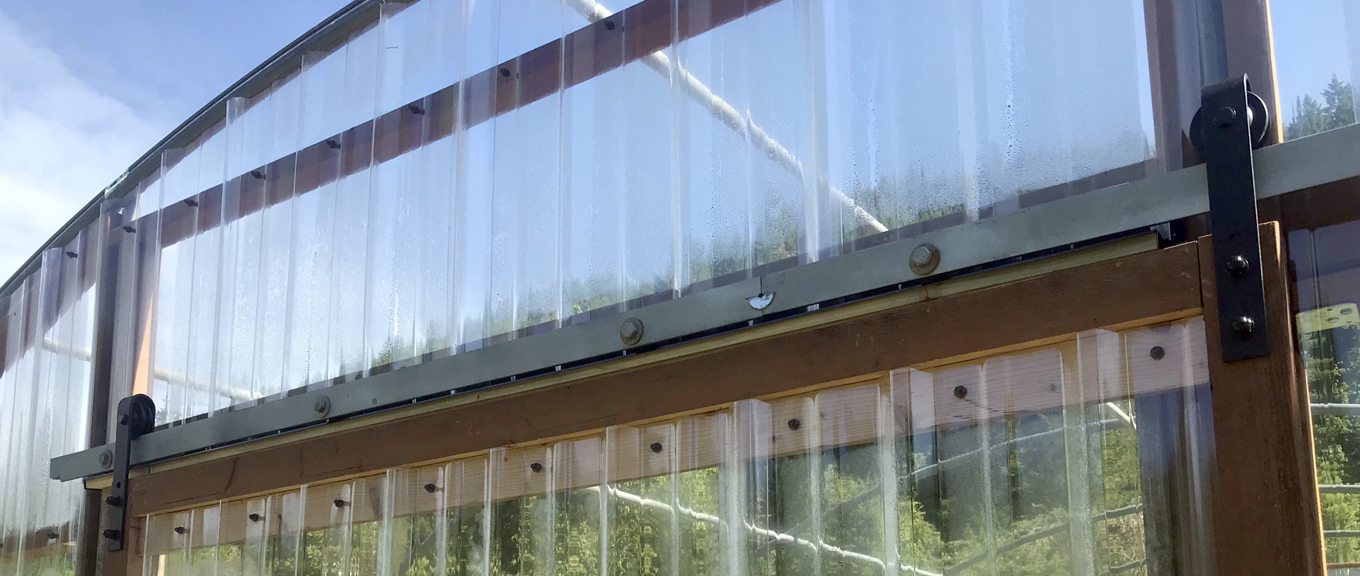
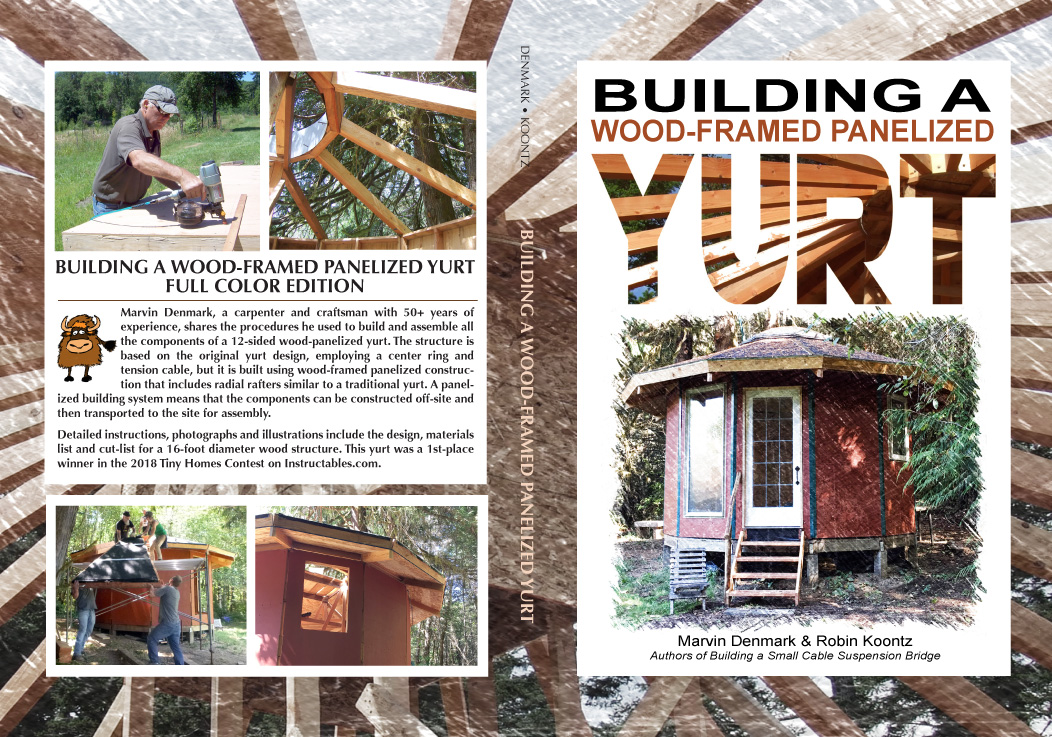
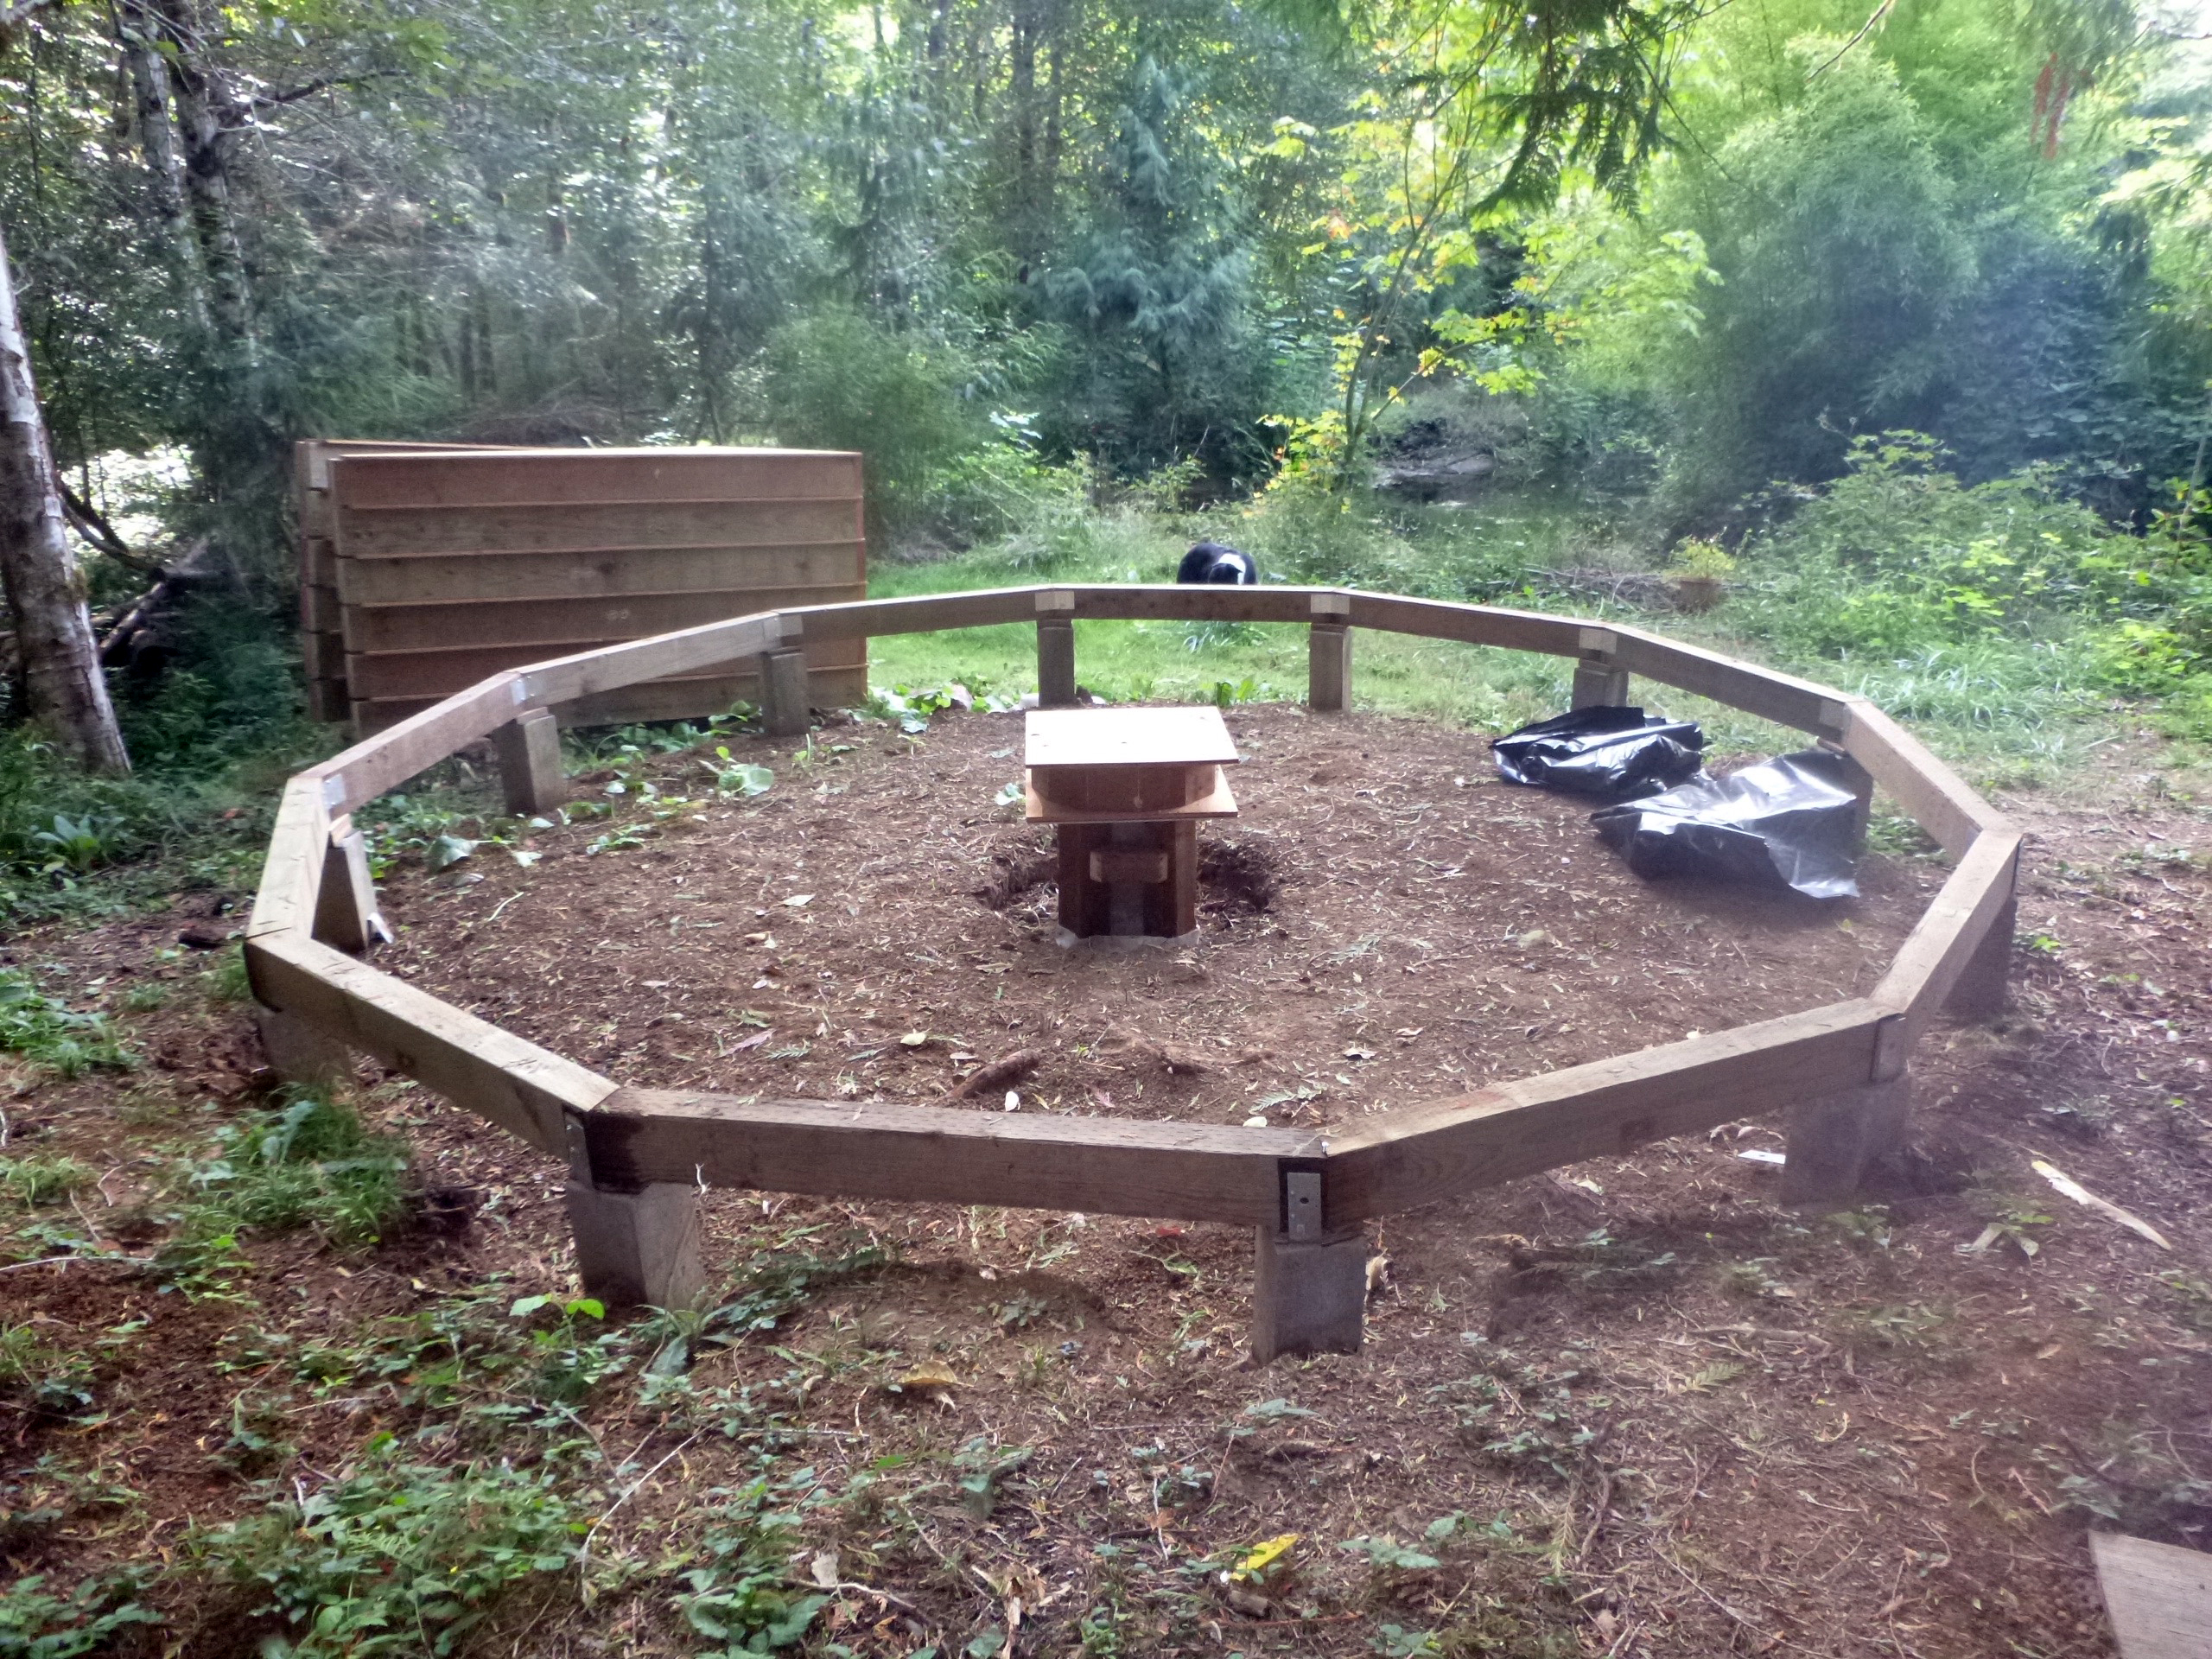
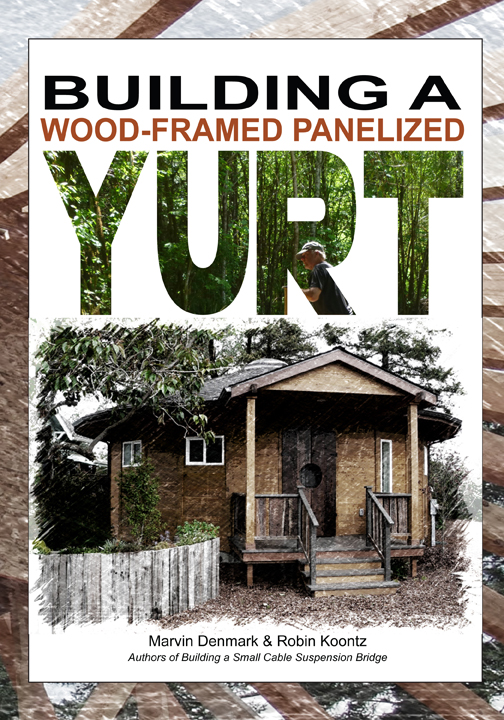
Stay tuned for the publication of our new book, Building a Wood-Framed Panelized Yurt. You can see how the yurt is progressing via Facebook’s Yurt Yaks.

Images, diagrams, and text copyright 2013-2018 by Marvin Denmark and Robin Koontz unless otherwise noted. Please do not copy and post my content anywhere without permission. Thank you.


Building a Wood-Framed Panelized Yurt

When most people hear the word “yurt,” they think of one of these.

Nomadic tents known as Yurt at the Issyk Kul Lake, Kyrgyzstan

Or maybe one of these.

Yaks in the plains of Mongolia

While it’s true that most yurts are constructed with wood framing (or sticks) and covered with animal skins (like yak) and/or canvas, a more solidly built yurt is also a traditional building design, such as this one.

Wooden Mongolian yurt

I built and/or consulted on several wood-panelized yurts of various sizes in the years before I retired in 2011. I decided that a fun retirement project would be to build my own version of a wood-framed panelized yurt on our property. Here’s one of the yurts I built in recent years, with help from a team of strong arms. Mine is a similar design.

YAyurt3

Yurt under construction near Eugene, Oregon

For my yurt, I began by building a foundation.

CompleteFoundationYurt

Then I built 12 floor panels.

FloorPanelPlywood24

Then I built 12 wall panels.

WallAss-done

Then I built 12 roof panels.

roofpanelplywood

I cut and finished 12 rafters.

raftertops

I constructed a huge wooden ring, which houses the skylight dome. All of this work spanned many months, between other projects. But with all the pieces done, it was time to put it all together.

ring

This week, our neighbor came over to help install the floor panels. It took us about an hour.

yurt2

The walls are next, and then the wall cable, and then the tower….well, there are a few steps to get to completion, and it will take however long it takes. I will keep you posted.

And FYI, we are writing a book about the entire process so we can share how to build this yurt with anyone who is interested! Stay tuned as we progress, and be sure to watch for news on the book. Here is the tentative cover, designed by Robin Koontz. That’s a yurt that I built in Florence, Oregon.

small

Building a Wood-Framed Panelized Yurt
by Marvin Denmark and Robin Koontz
ISBN-13: 978-0692957370
ISBN-10: 0692957375

Thanks for stopping by! The first three photos are owned by istock.com, the rest were taken by Robin Koontz. Cover design by Robin Koontz, copyright 2017.


Marston Mat Mudway

Marston Mats, aka perforated steel planking (PSP), were developed by the U.S. before World War II. The idea was to quickly build temporary runways and landing strips. They were first used at Camp Mackall airfield near Marston, North Carolina, in the U.S.

marston

A Curtiss P-40 Warhawk on a Marston Mat runway at Milne Bay, Papua New Guinea in September, 1942. – public domain

marstonmat


I honestly don’t remember where or when I acquired four of these heavy metal planks, probably saw them advertised somewhere. I know I didn’t pay much for them. The idea at the time was to see about using them for my bridge deck. I wasn’t able to acquire any more at the time, so opted for the wood deck you see in the photos. One of these days I’ll replace that deck with something metal. I like that the perforations would let air flow through so the bridge would not be as vulnerable to high wind gusts.

Meanwhile during our rainy season, areas where we like to walk get more than a little muddy. The small creeks flood and send water everywhere. I’m always digging ditches to try to control the flow somewhat, but this particular area is low, so it’s always a mucky mess.

mats
So I installed some 2×10 planks I had as well as the four Marston Mats. Nothing much to it, other than first setting out short cross members for everything to rest on. While you could just toss the planks into the mud, raising them up a bit makes them more effective, and you can get them level to some extent. I screwed down the wooden planks, but the mats were heavy enough to be stable without reinforcement.

jeepmud
When finished with the project, we noticed that Jeep the dog appreciated the wooden planks, but not so much the mats. He proved the point that the Marston Mats would not be the best material for a bridge, assuming you want to allow your four legged friends to come across with you. We’ll be watching for other options.

Thanks for stopping by! Be sure to check out our suspension bridge book. Here is the link:

Building a Small Cable Suspension Bridge with the Cable Locking System

Images, diagrams, and text copyright 2013-2016 by Marvin Denmark unless otherwise noted. Please do not copy and post my content anywhere without my permission. Thank you.

Habitat for Pond Turtles: Turtle Sofas!

There’s a stream that runs through our property and into Wildcat Creek, close to where our bridge resides. Though the stream is officially nameless, we’ve always called it Phillips Creek, because it ran through the Phillip’s place; Belle’s Creek, because our neighbor’s dog loved to play in it; and Penn Creek, so named by the ODFW who showed up (without notice) to count fish one day. Whatever the name, the stream tended to cause flooding in the pasture in winter, so we put in a pond. How that was done is a blog for another day.

buddylakeseptembercalendar

buddy

At first the pond dried out in summer, but once the beavers noticed it, they routed more of Phillips Creek so that it flowed into the pond year-round. We installed a bigger culvert along with a fence to keep the beavers from clogging it up, and had ourselves a nice pond we called Buddy’s Lake, after our beloved Swamp Puppy, Buddy.

We had seen pond turtles in various wetland areas on our property, but were amazed at how fast they discovered Buddy’s Lake. They first appeared on a log that we’d left out, sunning themselves in the spring chill. When that log began to sink, as logs are often prone to do, we decide to make turtle sofas.

turtlemom-baby

Previously we milled up a few logs for various projects and had kept the sides for benches or whatever. So why not a turtle sofa? And to keep our sofas from sinking, we screwed on strips of rigid insulation we also had left over after building our house. The material isn’t toxic for the watershed.

turtlesofa11
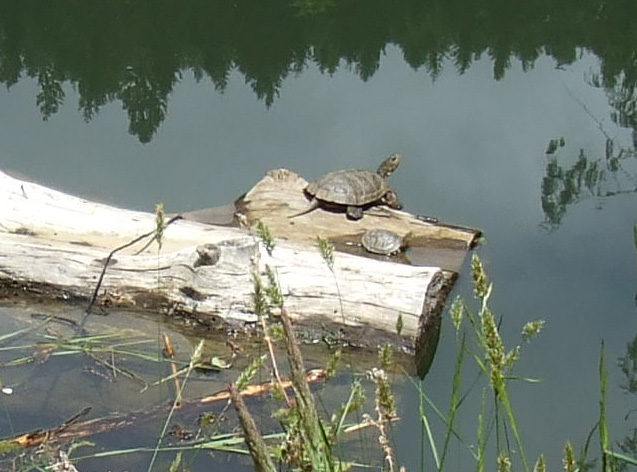
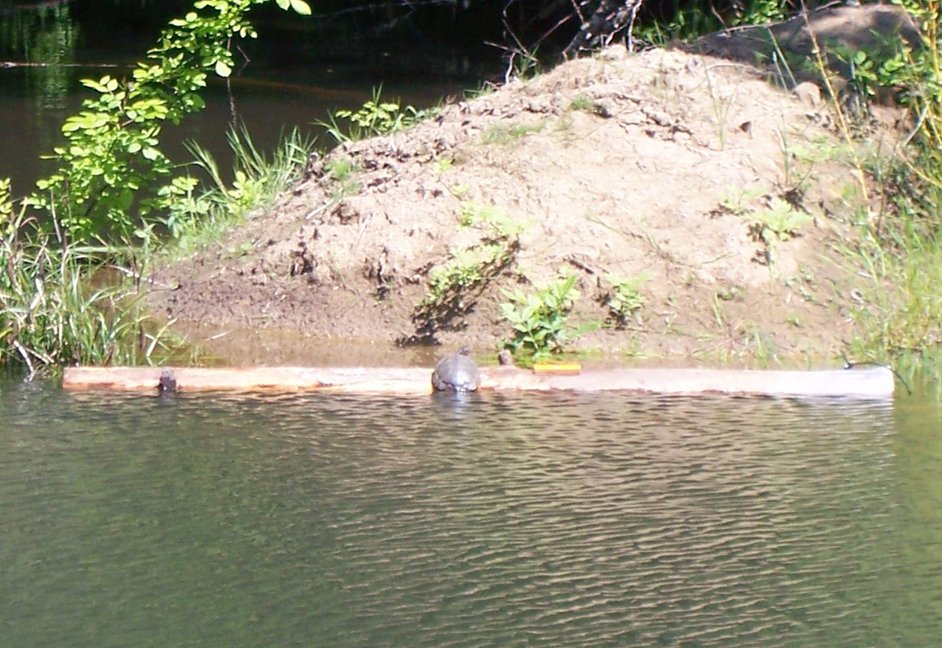
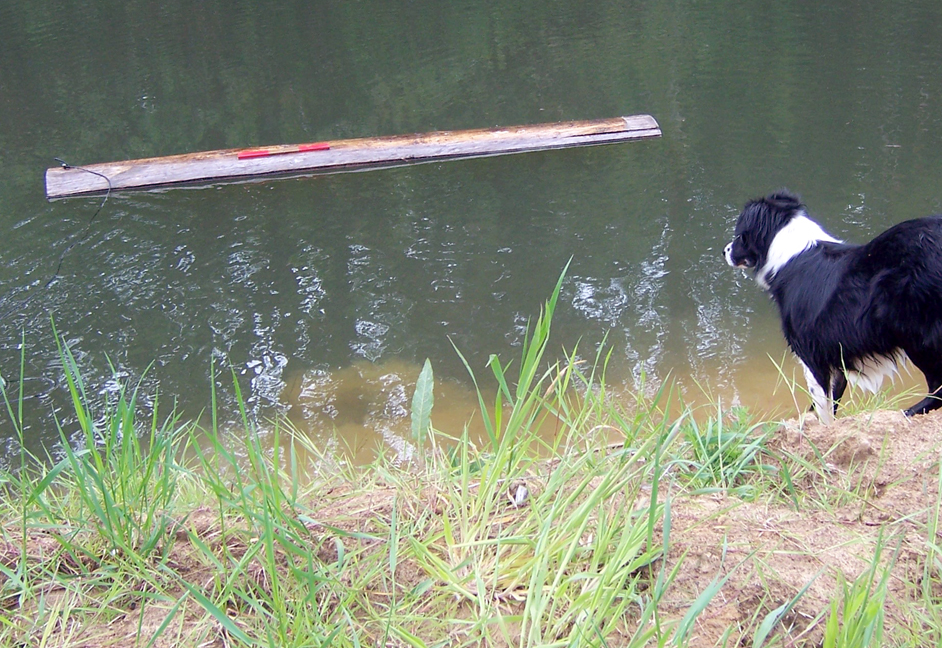
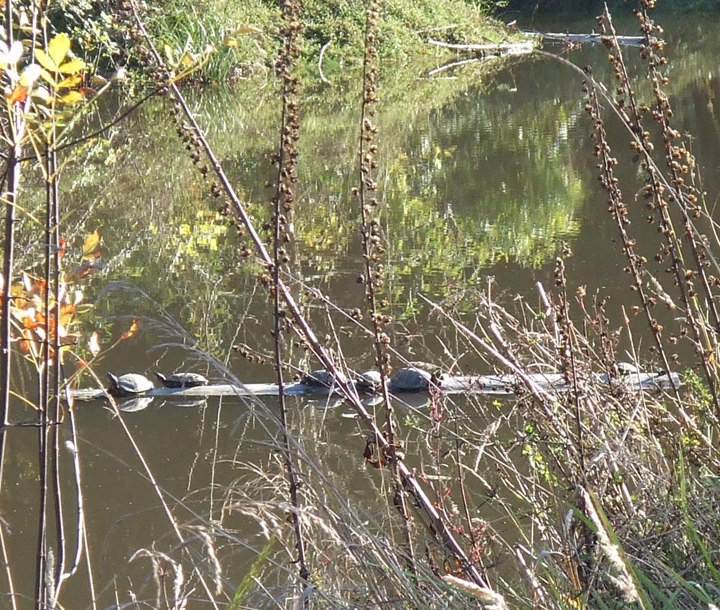
After launching the first sofa, we noticed that it tended to hang out close to the shore where a turtle might feel vulnerable to land animals, especially the two-legged variety.

turtlesofa12

This turtle is game to try anything new!

So we tied an anchor to a rope attached to the sofa and tossed it out so the log would float more in the middle. We also roped the sofa to a tree on shore so we could haul it back in if need be. And, we added measuring sticks as a fun way to see how big the turtles were. A full grown pond turtle gets to be 6-7 inches long.

turtlesofa9

Jeep, Buddy’s predecessor, wonders why we threw such a big stick for him to fetch.

windjammers

We added windjammers to a couple of sofas to help stabilize them. Probably not necessary unless you have beavers who like to knock them over and use for their dam.

turtlesofa1

This is a turtle favorite, probably because of the moss that has grown on it. Without the foam underneath, this old log would have sunk by now.

turtlebunch

Six is not a crowd!

We’ve seen up to nine pond turtles at once on Buddy’s Lake. We’re happy that our turtle sofas are a preferred place for them to hang out. Or do whatever it is turtles do.

turtlelovecard

A Simple Swamp Bridge

We continue to expand the trail system on our property in the Great Northwet, and that’s not a spelling error. Here in western Oregon many areas that are passable in summer become higher-than-boots water in winter. One spot we have is a small wetland that is fed by a stream that runs year-round, just not as torrential during the dry months. I decided it would be a good place to put a small stump-and-plank bridge so that we could connect two trails we like to use.
swampbridge4
swampbridge3
I had some 20 inch diameter cedar posts that would work well for the bases. Planted in water and being cedar, they would not rot anytime soon. I cut them with a chain saw and then the fun part began – digging holes in deep mud, in water. Even in summer, it is a very boggy area. My goal was to dig until I hit more solid ground, but of course the sludge would just pour back into the hole as I shoveled. I dammed up in front of each hole as I dug to divert some of the water, and that helped. Mostly it just took persistence and a bit of mind over matter.
swampbridge5
swampbridge2
I set the posts 10 feet apart for my 2×10 planks. If you use something smaller for planks, it is probably best to space the posts closer together. I cut the planks so that they centered on the posts and screwed them down. Then I used metal strapping to tie them together. I could add another deck using smaller dimension lumber to really beef it up, which I’ve done for other bridges on the property (more on them later!), but after walking across this bridge every day for several months now, it seems to be all we need for such a short span – about 40 feet. I might punch some metal posts on each end and the center and add a rope railing for balance. In any case, it’s not a bridge for the non-sober!
finishedbridge
Thanks for stopping by! Be sure to check out our suspension bridge book. Here is the link:

Building a Small Cable Suspension Bridge with the Cable Locking System

Images, diagrams, and text copyright 2013-2014 by Marvin Denmark unless otherwise noted. Please do not copy and post my content anywhere without my permission. Thank you.

Copper Pipe Shelf System

Here’s a shelf system I designed for a friend who was going to build something similar using galvanized pipe. I thought copper was a better idea because there would be no need to thread the pipe ends.
Copper Shelf Unit
The drawing shows a single tower. Several towers can be built and connected together. To make the tower assembly you could either screw or solder the joints.

Thanks for stopping by! Be sure to check out our bridge book. Amazon has the book on sale for about $12.00 right now. Here is the link:

Building a Small Cable Suspension Bridge with the Cable Locking System

Images, diagrams, and text copyright 2013-2014 by Marvin Denmark unless otherwise noted. Please do not copy and post my content anywhere without my permission. Thank you.

Zip Line!

When I created this blog I promised something would be posted about zip lines aka ziplines. So, here is the first post about all that.

I visited Costa Rica a few years ago and rode on my first wild zip line. That is, it wasn’t a carnival ride or a rope in someone’s yard. It was down a mountain, in the rainforest, and attached to trees, and pretty freeking amazing. When I got home, my spousal unit said, “You’re going to build one of these, aren’t you?” And I said “Of course!”

I set up a a 420 foot zipline on our property. So far I’ve built the tower and ladder, which is a great treehouse getaway:
ZipBuilder

and I built the lower platform:
ZipLanding

and have installed and tested a temporary (smaller diameter) cable. Here is a fun movie of a sandbag wearing my spousal unit’s blouse slamming into the platform:
Zip Line Test with Fake Spousal Unit Getting Seriously Hurt.

While I was pleased at the 32 MPH speed, this test proved that I need to raise the final cable a bit on the tower tree and on the base post as well when I finalize everything.

There are more photos of the building process on my website: Zipline Photos.

The full size cable is up on the hill ready to install but at this point the path down the mountain needs to be cleared (again) before we continue with the construction. For now, I’m working to finish building our house, so this project is on hold for the moment, but will be completed at some point.

What’s funny about this particular project is that when my spousal unit’s elderly relative heard about it, she wrote us out of her will, telling another relative in private (which of course didn’t remain private) that “Building a zip line is pure Tom Foolery! These people have time to burn!” Well, building a zip line is what I do on the weekends rather than watch football. Just don’t call me Tom.

Thanks for stopping by! Be sure to check out my book about building a bridge. It includes some cool ideas that apply to other projects, like how to put a really tall post into a deep hole when you aren’t that tall. Amazon has the book on sale for about $12.00 right now. Here is the link:

Building a Small Cable Suspension Bridge with the Cable Locking System

Images, diagrams, and text copyright 2013 by Marvin Denmark unless otherwise noted. Please do not copy and post my content anywhere without my permission. Thank you.

Repurposing Old Stuff – DIY Shelf Unit

This was actually my partner’s idea, but since I’m the one who put it to use I will take the credit: a shelf made from an old ladder!

laddershelves

This shelf was made using an old beat up aluminum ladder that I cut in half for the task and 3/4″ plywood for the shelves. I used 2×10 blocks for the middle supports, but they didn’t need to be that serious, I just had scraps around.

True, ladders have been used as shelves in other applications, but I haven’t seen them set up in this way. So there you go – something cool to do with an old ladder or two. We might build something like this inside our house.

Or maybe not.

Be sure to check out my book about building a bridge. It includes some cool ideas that apply to other projects, like how to put a really tall post into a deep hole when you aren’t that tall. Amazon has the book on sale for about $14.50 right now. Here is the link:

Building a Small Cable Suspenion Bridge with the Cable Locking System

Images, diagrams, and text copyright 2013 by Marvin Denmark unless otherwise noted. Please do not copy and post my content anywhere without my permission. Thank you.